How to Air Fry Scones
Source: USDA food safety data + manufacturer guidelines
AirFryerCharts · Compiled & reviewed ·
Avoid these 3 mistakes
The difference between crispy and soggy
See the 3 mistakes →
Step-by-step
- Preheat the air fryer to 350°F for 3 minutes. A hot basket gives the cold-butter dough an immediate blast that creates the steam pockets responsible for the flaky layers before the structure sets.
- Cut cold butter into the dry ingredients, leaving pea-sized chunks throughout. Those solid pieces of butter melt into steam during baking and lift the dough into distinct layers — if you work them in until smooth, the scones bake up flat and dense.
- Pat the dough into a round, cut it into wedges, and arrange them in a single layer with at least 1 inch between them. Scones rise and spread as they bake, and crowding fuses the edges into a doughy mass that cannot brown.
- Optionally line the basket with a parchment round to catch melting butter. It is not strictly required, but it stops the rendered fat from pooling and burning on the basket, and it makes cleanup simple.
- Brush the tops of the wedges with a little milk or beaten egg. This is what gives scones their glossy, golden-brown finish — unbrushed tops bake up pale and dull no matter how long you cook them.
- Air fry at 350°F for 10–12 minutes. Check at 10 minutes — scone dough browns fast, and the wedges should be deep golden and risen to about one and a half times their height when done.
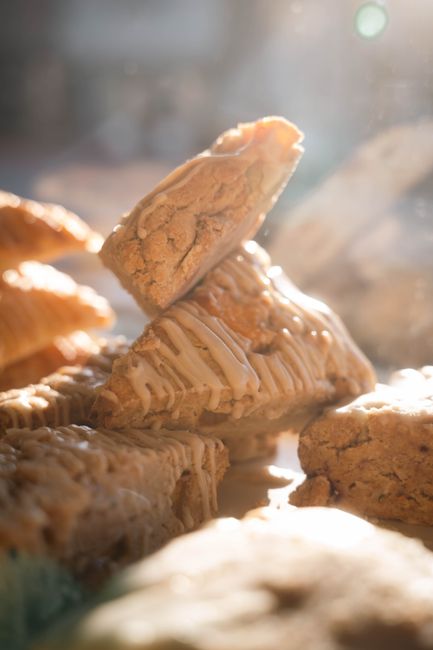
Air fryer scones bake up tall, flaky, and golden in about 12 minutes, with shatter-crisp edges giving way to a tender, buttery, layered crumb that rivals any bakery version. The forced convection does the work of a hot oven, browning the outside while the cold pieces of butter inside melt into steam and create the pockets that separate the dough into distinct, flaky layers. The secret is cold fat and a light hand — overworking the dough melts the butter and develops gluten, turning flaky scones into tough, flat biscuits. Cut the dough into wedges, arrange in a single layer with gaps, and brush the tops for color. A parchment round keeps the butter from pooling and burning on the basket.
Why 350°F and 10–12 Minutes?
350°F (175°C) is the temperature that lets scones rise, layer, and brown in the right order. The cold butter needs time to melt into steam and lift the dough before the outside sets, and 350°F allows that lift; push to 375°F or higher and the tops crust and brown before the layers finish separating, giving you flat, dense scones. Below 340°F they dry out before coloring. The 10–12 minute window is moderate — check at 10, since scone dough is lean and crosses from golden to burnt faster than you might expect.
Pro tips
- Keep the butter cold and leave pea-sized chunks in the dough — those pieces melt into steam and create the flaky layers
- Handle the dough as little as possible; overmixing develops gluten and melts the fat, giving you flat, tough scones
- Space wedges at least an inch apart so they can rise and brown without fusing at the edges
- Brush the tops with milk or egg for a golden, glossy finish; unbrushed scones bake up pale and dull
- Line the basket with parchment to catch melting butter and simplify cleanup
How to Tell When It's Done
Scones are done when the tops and sides are deep golden brown, the wedges have risen to roughly one and a half times their original height, and the layers are visibly separated at the edges. Tap the top — it should sound slightly hollow and feel firm, not soft or doughy. The bottom should be golden, not pale or wet. If the tops are brown but the centers feel squishy, the heat was too high; tent loosely with foil and give them another minute to cook through without further browning.
Common mistakes
- Using warm butter or overworking the dough. Both melt the fat before baking, destroying the steam pockets that create flaky layers — keep butter cold and handle the dough as little as possible.
- Crowding the wedges. Scones rise and spread, and touching edges fuse into a doughy clump that cannot brown.
- Skipping the top wash. Without milk or egg, scones bake up pale and dull — the wash is what gives them their golden, glossy finish.
- Overbaking for extra crunch. Scones dry out fast once fully browned; pull them the moment the tops are deep golden.
Serving Suggestions
Let the scones cool for 5 minutes before serving — warm dough crumbles when cut. Serve split with clotted cream, butter, lemon curd, or jam for the classic cream-tea treatment. Blueberry, cranberry-orange, and plain are all excellent here. For a brunch spread, pair them with croissants and fresh fruit.
Pairs well with: Croissants
Times and temperatures verified against USDA FSIS safe minimum internal temperatures and manufacturer cooking charts (Ninja, Cosori, Instant Pot Vortex). Every air fryer runs slightly hot or cool — treat these as starting points and adjust ±2 minutes to taste.
Scones air fryer FAQ
How do I get flaky layers in air fryer scones?
Use cold butter and a light hand. Cut the butter in until pea-sized chunks remain throughout the dough, then handle it as little as possible. Those butter pieces melt into steam during baking and lift the dough into layers; overmixing melts the butter and develops gluten, giving you flat, tough scones.
Why did my scones come out flat and dense?
The butter was too warm or the dough was overworked. Warm butter blends into the flour instead of staying in chunks, so there is nothing to create the steam pockets that lift the layers. Keep the butter cold, mix just until the dough comes together, and pat rather than knead it.
Do I need a liner for air fryer scones?
It is optional but recommended. Scones release butter as they bake, and a parchment round catches the rendered fat so it does not pool and burn on the basket, which also makes cleanup simple. You can bake directly on the basket, but expect a thin layer of butter to collect underneath.
How do I know when scones are done in the air fryer?
The tops and sides should be deep golden brown, the wedges risen to about one and a half times their height, and the layers visibly separated at the edges. Tap the top — it should sound slightly hollow and feel firm. Check at 10 minutes, since scone dough browns fast and dries out if overbaked.